Growing a flourishing garden comes with many benefits and rewards, but not everyone has a yard to make this a reality. There are many different ways to get around this, however, and window gardens are an easy, creative alternative to the average student’s lack of property.
Garden prerequisites
The essential prerequisite to growing any successful garden requires thoughtful preparation. Educating yourself about your garden’s function, the plants’ needs and its ideal environment is the minimum amount of preparation you should have before beginning your garden.
Plan ahead by getting to know your plants’ specific needs, including sunlight, water, soil chemistry, maintenance and harvesting, as well as the amount of space needed for plant maturation and what type of planters would best accommodate them.
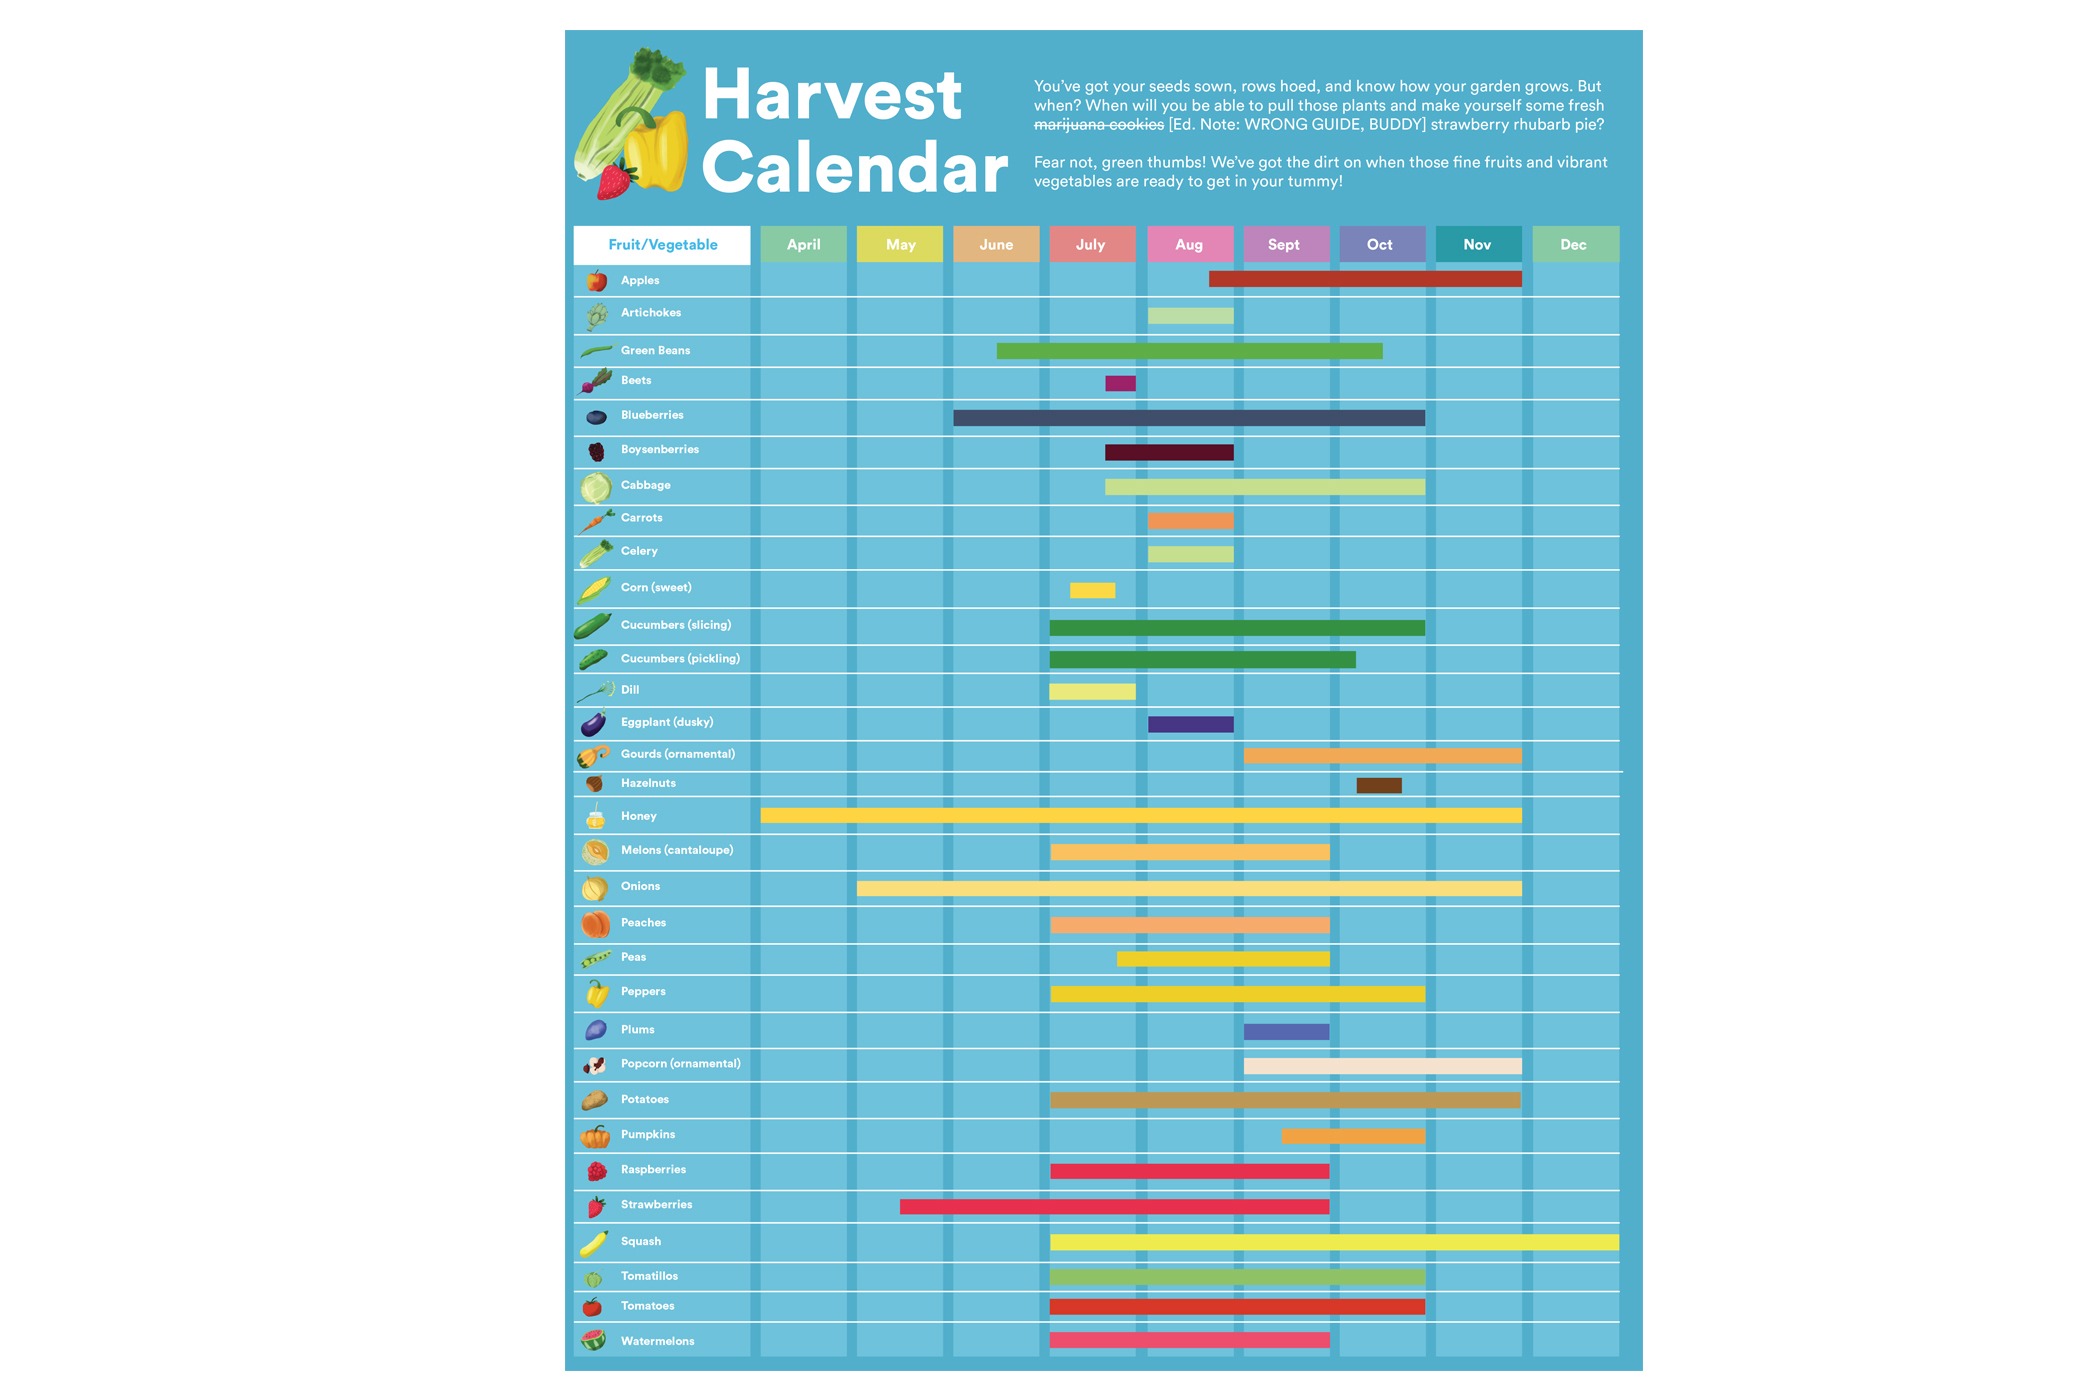
Garden roster
Cooking herbs are generally the easiest and most useful types of plants to grow on your windowsill. If you’re a beginner, try planting an herb such as basil. Other common and easy plants to grow include chives, rosemary, lavender, oregano, dill, mint and thyme.
Methodology
While anyone can begin their window garden with seeds, depending on how much time you have to invest in preparation and cultivation, you might consider purchasing seedlings and then transferring them to a new home container. More experienced botanists can also begin their new garden through propagation.
Choosing your planter
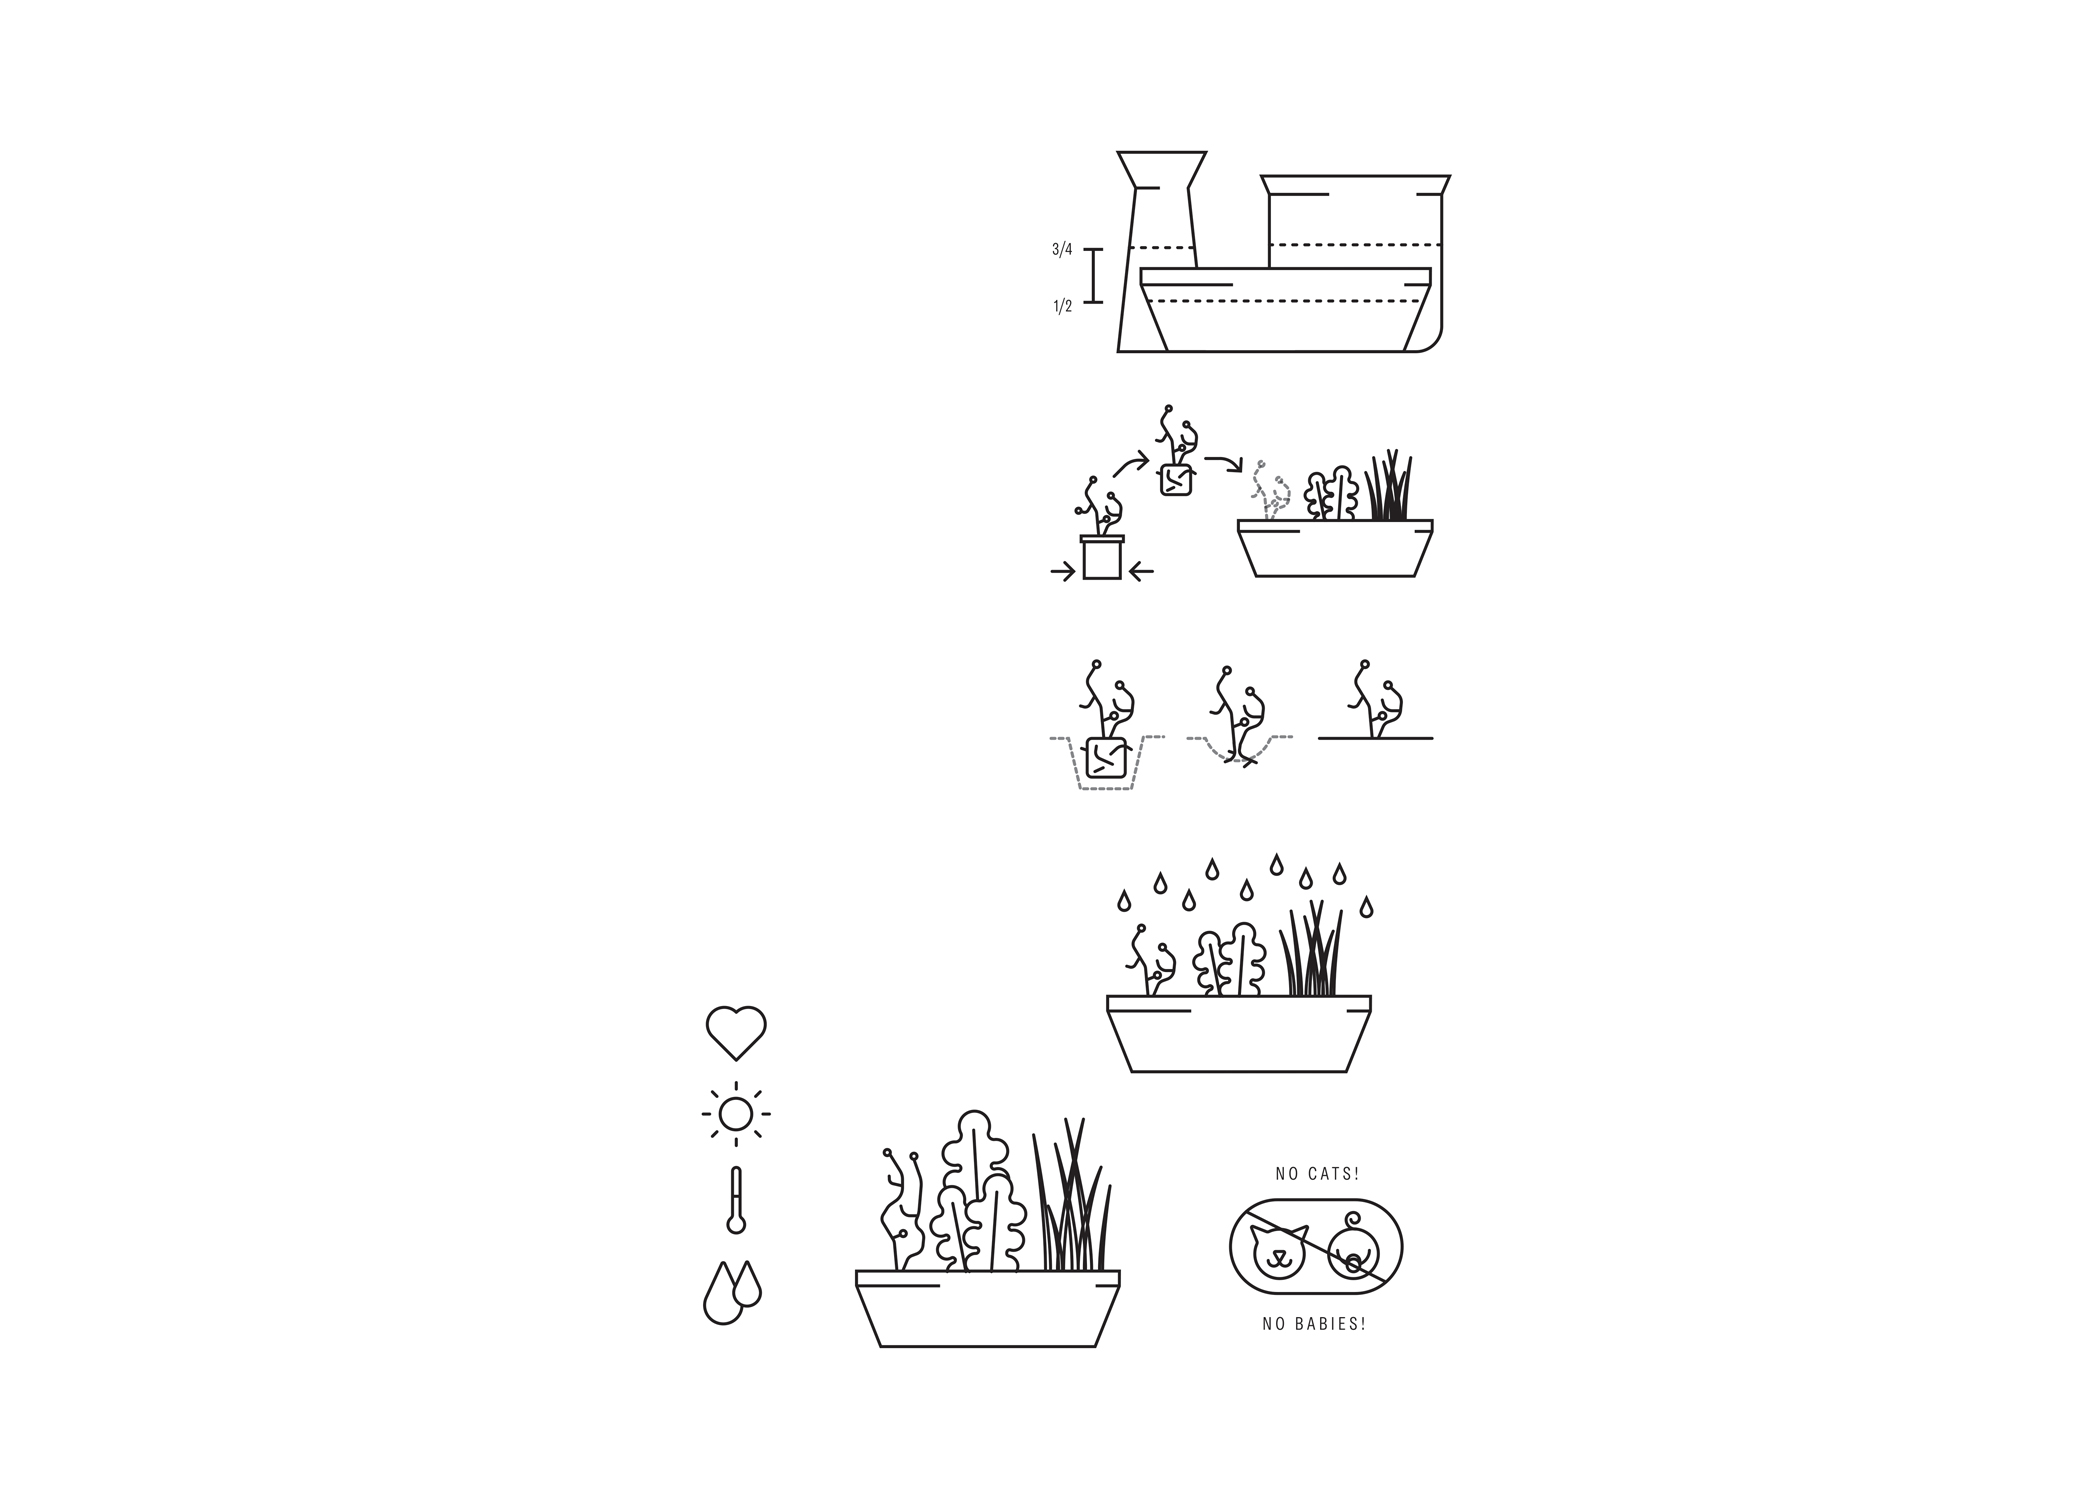
Preparing your window garden requires deciding what type of planter you’re going to use. Mason jars will work, but they don’t provide any drainage if you accidentally over-water. This can be avoided by placing a layer of small rocks or marbles on the bottom of the jar before adding soil in step two. The jar’s rock layer should fill about one-fourth of the container.
To keep it simple, use a ceramic planter with a bottom tray that can collect and absorb excess water.
Step one
Once you have an ideal window location for a window garden, prepare your seedling’s transition from its original container by filling the planter about one-half to three-fourths full of fresh, fertilized soil. If the soil feels too dry to begin with, try applying a small amount of water over the base layer.
Step Two
Gently remove the seedling from the plastic container by pinching the container bottom, which loosens the compact bottom and allows the seedling root to gently detach from the original container.
Lift the seedling from the container by handling the soil block or top leaf, not the seedling stem itself. Grabbing the seedling’s bottom stem could break the stem from the roots or uproot the entire plant itself.
If the leaf breaks from the stem, the leaf can grow back. If the stem breaks, the plant dies.
Step Three
Keep the seedling upright as you place the plant into the middle of the planter. Once in place, gently loosen the outer soil the seedling came with in order to mix the original soil with the new soil you’re about to add around it. Fill up the rest of the container surrounding the seedling while gently integrating the original soil. Make sure the soil is not too compact and level with the original soil height of the seedling.
Step Four
For the first watering in the seedling’s new home, be sure to water just a little bit more than you normally would. The amount of water needed varies depending on your plant, but indoor herb gardens need to be watered often throughout the day.
Step Five
Once your herb begins to grow, make sure to give it lots of love by pruning and harvesting when needed.
Be sure to keep your plants’ environment healthy and comfortable by avoiding too much heat, cold, toxins, or pest exposure—cats and small children included!